
Would you like to set up the links visitors use to move around your site? In Lennox, you manage your navigation menu in the Site Editor, not in the older Appearance > Menus screen.
This is the guide to use when you want to create your main menu, add or remove links, reorder items, or switch from an automatic page list to a custom menu you control.
When to manage navigation
- Set up your main menu for the first time.
- Add, remove, or reorder links in your header navigation.
- Switch from an automatic page list to a custom menu you control.
Editing your navigation menu
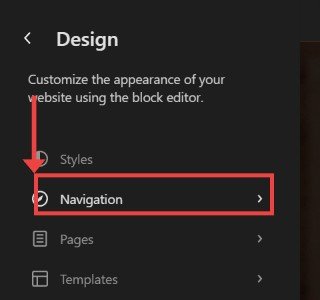
To manage navigation, log in to your site and go to Appearance > Editor. If you do not see the main Design screen right away, click Back until you do, then click Navigation.
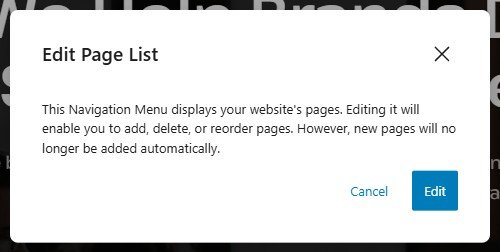
Open the menu you want to manage. On the verified test site, WordPress showed a single item called Sample Page. If WordPress shows the Edit Page List message, click Edit. This turns the automatic page list into a menu you can manage manually.
You can then add links with Block Inserter, remove links you do not want, and reorder items in the navigation.
Lennox note: the theme includes a Navigation block in the header template part, so your main menu is part of the header layout.
Saving navigation changes
When you have unsaved changes, the top-right button changes to Save. Click Save to keep your changes. When everything is stored, that button changes back to Saved.
That's it. In Lennox, you manage navigation from Appearance > Editor > Navigation.