
Would you like to make a small visual change to your Lennox site without editing theme files? Custom CSS is a good fit for quick tweaks to spacing, colors, sizes, or visibility when those changes are not available in the normal design controls.
Because Lennox is a block theme, you add custom CSS in the Site Editor, not through the older Customizer workflow used by classic themes.
When to use custom CSS
- You want to adjust spacing, colors, fonts, or alignment.
- You need a quick fix for one part of the site.
- You are comfortable pasting a small CSS snippet.
- You do not want to edit theme files.
Adding custom CSS
To add custom CSS in Lennox, log in to /wp-admin and open Edit styles. On this Lennox site, that link appears on the Dashboard welcome panel. You can also go to Appearance → Editor and open the Styles area.
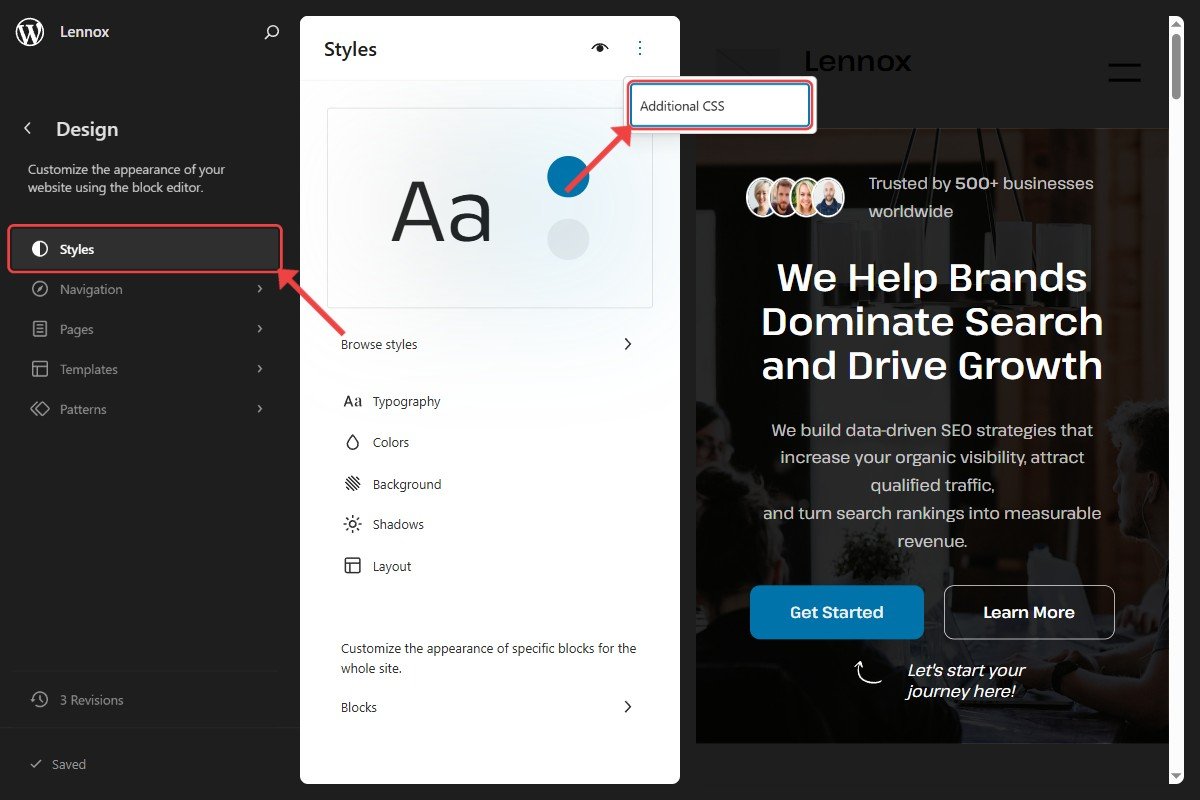
From there, open the More menu with the three dots, then click Additional CSS. Paste or type your CSS into the editor, and when you are happy with the change, click Save in the top right.
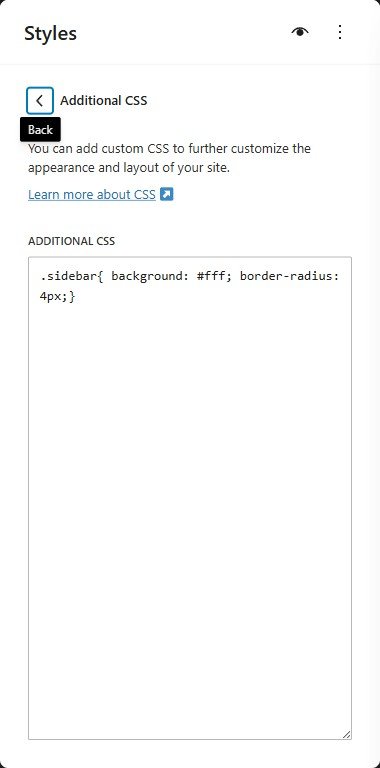
Example CSS
If you want your buttons to have more rounded corners, you could use this CSS:
.wp-block-button__link {
  border-radius: 999px;
}
Paste the code into the Additional CSS panel, save the change, then refresh the front end of your site to check the result.
Saving your changes
After you change the CSS, use the top-right Save button. If WordPress accepts the change, the button changes to Saved. If the button does not become active, WordPress has not detected a change yet.
That's it. In Lennox, custom CSS is added through the Site Editor by opening More → Additional CSS, adding your code, and clicking Save. It is usually best to start with small changes, test often, and remove any CSS that causes unexpected results.